Showing posts with label Ice Cream. Show all posts

Saturday, April 12, 2014

Maple and Oat Banana Ice Cream Sandwiches


Happy spring, everybody!

This is what spring looks like in Mississippi:


These pictures also represent someone who had been completely irritated and annoyed for a solid week and is trying really hard to think peaceful and kind thoughts in her mind.

The struggle is real, folks.

I didn't think I would be so happy to see spring because I love winter so much, but, yes, I am happy spring is here. Spring has won me over. *Standing ovation by blogger for spring*

And since the days are getting warmer, I've got a great little recipe today that will cool you off,  Maple and Oat Banana Ice Cream Sandwiches.

BUT WAIT!

This recipe is pretty darn healthy. (And no doubt, when it is published, the healthy police people will stop by and leave a comment about how I messed up and what I did was not 'really' healthy, and blah, blah, blah.)

But I am still going with my thoughts that although this recipe may not be perfect, we really liked it, there are some healthy things in it, and I feel really good about.  So there.  Baby steps.


Here are my notes:


--You will absolutely need to line your pan with foil, to lift out the frozen layers.

--You could probably leave out the 5 teaspoons of maple syrup in the ice cream part if you want--the banana ice cream is sweet enough without it, but I just wanted a subtle maple flavor throughout.

--You could probably substitute with honey instead of maple syrup.

--I am proud of myself because I didn't use any sugar other that the maple syrup. *big cheesy grin*

--I used 5 bananas, but that could probably be adjusted depending on how thick you want your middle layer to be.


Maple and Oat Banana Ice Cream Sandwiches


4 tablespoons butter
1/2 cup maple syrup
3 cups quick oats
1 1/2 cups finely chopped walnuts
5 medium very ripe bananas, peeled and cut into small chunks and completely frozen
5 teaspoons maple syrup
  1. Heat butter and 1/2 cup maple syrup in a small sauce pan, whisking until melted and smooth. Place the oats and walnuts in a large mixing bowl. Add the maple syrup mixture and mix to evenly coat.  
  2. Line two 8 x 8 inch square pans with foil letting foil hang over sides, then lightly spray with cooking spray.  Divide the oat mixture between the two pans, pressing firmly and evenly into the bottom of the pan.  Freeze until very firm, about 3-4 hours in deep freeze.
  3. Place the bananas in a food processor with 5 teaspoons maple syrup and process until smooth and creamy. 
  4. Immediately spread the banana ice cream evenly over one frozen oat layer.  Carefully lift the other frozen oat layer out of the pan by using the foil, then peel the foil off and place on top of the ice cream, pressing down slightly.  Freeze until firm.  Remove from pan using the foil to lift it out, then cut into bars quickly.
Tip:  I peel my very ripe bananas and freeze them on a baking sheet that has been lightly sprayed with nonstick cooking spray.  When they are frozen they go into a ziplock bag to store in the freezer for smoothies or ice cream.  

Aaaaaaand...here is my grandson and his freckles.  Because I can.


Pin It!

Tuesday, February 18, 2014

Two Ingredient Dark Cocoa Banana Ice Cream


You guys.

I've been seeing one ingredient banana ice cream float all over the Internet for a couple of years now, but I always told myself that it probably tasted like baby food and no thank you please.

But one day I realized I had an overaccumulation of bananas in my freezer, so I thought I'd give this "ice cream" everyone was raving about a try.

Now listen and listen good, I am not even stretching the truth a little bit when I tell you that this is delicious.  This is my go-to dessert when I want to be all healthy and stuff.  The texture is very, very much like soft serve ice cream.  It's really hard to believe but it is.

AND THIS--->>>  To me, it does not overwhelmingly taste like bananas.

I love bananas, but I want it to taste more like ice cream and it does.  To me.  Others may disagree.

If you are a banana hater, this is probably not for you. But if you're not and you want something healthy, creamy, cold, and delicious, you should give it a try.  Read my notes below, but honestly, it's a cinch.

Just think, it's non-dairy and no added sugar.


My notes:

--I like to add dark cocoa powder to mine.  I am not a fan of dark chocolate, but I LOVE the dark cocoa powder.

--There are lots of recipes out there with different mix-ins like peanut butter, Nutella, honey, nuts, etc.  I wanted to keep mine fairly healthy and simple.

--Give the food processor a little time to whip it up good.  Several minutes depending on your machine.  Mine is just a mini one, so it takes a bit.


--Depending on how hard the bananas are frozen and how powerful the food processor is (mine is not very powerful), it is helpful to add a teaspoon or two of heavy cream, half and half or regular milk to process easier.  I guess this would make it 3 ingredient, but you don't have to.

--It can be placed in the freezer to firm up a bit, but I love it soft and creamy.


--Ripe bananas are best.  I peel my very ripe bananas and freeze them on a baking sheet that has been lightly sprayed with nonstick cooking spray.  When they are frozen they go into a ziplock bag to store in the freezer for smoothies or ice cream.  


Two Ingredient Dark Cocoa Banana Ice Cream


1 medium very ripe banana, peeled and cut into small chunks and completely frozen
1 heaping teaspoon dark cocoa powder

  1. Place the banana in a food processor (a mini one works well) and process until almost smooth.  
  2. Add cocoa powder and process until very smooth and creamy.  Eat immediately or place in freezer to firm up.

Hint: Depending on how hard the bananas are frozen and how powerful the food processor is (mine is not very powerful), it is helpful to add a teaspoon or two of heavy cream, half and half or regular milk to process easier.


Tip:  I peel my very ripe bananas and freeze them on a baking sheet that has been lightly sprayed with nonstick cooking spray.  When they are frozen they go into a ziplock bag to store in the freezer for smoothies or ice cream.  


Pin It!

Friday, February 14, 2014

Chocolate-Hazelnut Malteds


Happy Valentine's Day!

In case you woke up this morning with Dung Fever or a really bad splinter or even a raging case of out-of-control, over-forty, hormonal issues that make you want to lie in a fetal position on the couch and suck your thumb, I have a quick and easy recipe that you can throw together in a pinch to fill your chocolate quota for this glorious holiday.   You can even send your boo to the store to get the ingredients because they are pretty straight forward and he won't have to call you six times and ask which aisle the "kwi-no-uh" is on and just what the heck does that look like anyway?

 It does NOT get easier than Chocolate-Hazelnut Malteds, folks.

(Alright, *yes* it does if you eat Nutella directly from the jar with a spoon.  But, really, isn't your Valentine worth flipping a switch on a blender?  Yes, he/she/it is.)

These are totally yummy and quite romantic when sipped from one tall glass with two straws.  (But that may be kind of hard when your lying in a fetal position.  Just give him his own.)

Your welcome.

PS.  Be sure to check out this recipe and some more chocolaty goodness by me in this month's edition of eat. drink. Mississippi.


Chocolate-Hazelnut Malteds


1/2 to 1 cup whole milk (depending on how thick you want it)
2 1/2 cups chocolate ice cream
1/2 cup chocolate flavored malted milk powder
1/4 cup Nutella or hazelnut spread
Extra hazelnut spread for garnish
Sweetened whipped cream, for garnish

Place the milk in a blender.  Add the ice cream, malted milk powder, 1/4 cup hazelnut spread.  Blend until smooth.  Place a spoonful of hazelnut spread in the bottom of each of two tall glasses, then pour in the ice cream mixture.  Garnish with whipped cream and drizzle with extra hazelnut spread.  2 servings.


Hint:  Heat a tablespoon or two of hazelnut spread in the microwave for 10-15 seconds.  Stir until smooth.  This makes it easy to drizzle on top.  

Pin It!

Friday, May 24, 2013

Strawberries ‘n’ Coconut Cream Pops


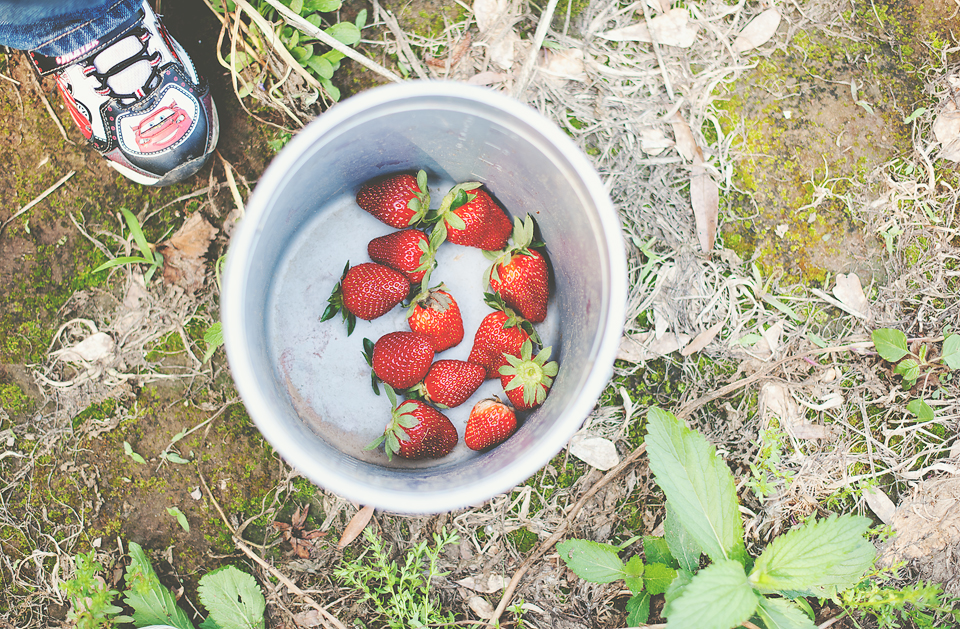
The other day, my husband and I took our grandson strawberry picking at a friend's strawberry farm.


And I had a grand vision of what a delightful, educational experience it would be, but to be honest, my grandson showed his hiny something fierce.  He threw several fits.  He was a tad ungrateful.  He tossed perfectly good strawberries on the ground instead of putting them in the bucket like he was supposed to.  He cried when he got dirty.

No, he screamed when he got dirty.


Second before he hurled this perfectly good strawberry three rows over. 

It was just one of those days.  *Sigh*


And when he went to sleep on the way home, my soul jumped for joy and then I did several fist pumps.  But I did come home with strawberries.

So after we ate what we could fresh, I froze the rest.  And this week I experimented with frozen strawberry pops, and after a failure, this was a success.  Originally I had wanted a strawberries and cream swirled pop, which I did make, but they were just okay.  Nothing to write home about.  But then I spied the cream of coconut in the pantry and * LIGHTBULB.*

The taste is of these are heavenly and it was all I could do to not eat the mixture straight out of the blender with a spoon.  Which is an alternative serving idea.  It's simple, but simple is perfectly acceptable at my house.  Next time I would like to cover them with homemade chocolate magic shell and sprinkle with coconut.

And there will be a next time.

So while your doing all your doings this Memorial day weekend, throw a batch of these in the freezer, and in four hours you will be a hero to your family.

PS.  And speaking of heroes, let's try to make some time to reflect on the meaning of this holiday weekend.


Strawberries ‘n’ Coconut Cream Pops


1 (15-ounce) can cream of coconut
3 heaping cups frozen whole strawberries

Place the coconut cream in a blender, then add one cup strawberries.  Process until smooth, then add remaining strawberries and process again until smooth.  Place small, disposable plastic cups on a baking tray and pour the mixture into each one, filling 3/4 full.  Place a wooden Popsicle stick in the center of each. (Mixture will be thick enough so that stick stands straight up.)   Freeze until firm, at least four hours.  Can also use Popsicle molds.


Pin It!

Wednesday, August 22, 2012

Spiced Sweet Potato Ice Cream

Houston, we have sunflowers.


Future sunflowers.
When we got back from the mountains, we had sunflower sproutlings everywhere.  I'm hoping these little guys are tougher than my basil.  My basil never did quite make it. 


So the only reason I'm not posting my vacation photos is because I haven't been motivated to edit them.

(Did I just hear someone breathe a sigh of relief? 'Cause I thought I just heard someone breathe a sigh of relief.)

I was, however, very motivated to edit these ice cream pictures.  It's that tricky time of year when all I can think of is fall, but it's still summer.  So, this sweet potato ice cream is perfect.  It has the warm autumn  flavors of sweet potatoes, cinnamon, nutmeg, and ginger, but in a cool and creamy ice cream.  To top it off, and you simply must make this butterscotch sauce from Smitten Kitchen.  It's easy and super delicious.  In fact, the day I made it, I made a quadruple batch and filled up some jelly jars.  I overdo things like butterscotch sauce.


Here are my notes:

-I cooked my sweet potatoes quickly in the microwave, then scooped out the insides and mashed them up with a hand mixer.

-The ice cream will have some sweet potato lumps, but you will strain those out, so no worries.

Discard the pulp that's left.
-I pour some of the ice cream mixture into a fine wire mesh strainer placed over a large pitcher.  Then I take a wooden spoon and press the mixture through the strainer.  This takes a little bit of work, but it's worth it for a nice smooth ice cream.  I discard the pulp that's left.  You might have to do this several times.


-You will know the ice cream base is done cooking when it coats the back of a wooden spoon and leaves a clear path when you run your finger over it.  This is after you have added the egg mixture back in.

-The ice cream will have a much better texture if you let it chill overnight.

-I used dark brown sugar, but you could use light brown too, or a combination of the two.

-I also topped mine with some toasted pecans.


Spiced Sweet Potato Ice Cream


3-1/4 cups half and half       
1-3/4 cups heavy cream           
1/8 teaspoon salt
1-1/2 cups cup dark brown sugar, divided               
8 large egg yolks                   
2 cups cooked and mashed sweet potatoes
1 teaspoon ground cinnamon
1 teaspoon ground nutmeg
1 teaspoon ground ginger
2 teaspoons vanilla extract

1.      Combine half and half, the cream, 1/8 teaspoon salt, and 1 cup brown sugar in a large heavy sauce pan.  Bring to a simmer over medium heat, stirring often until mixture reaches 175 degrees on a candy thermometer (just below scalding), about 15 min.  Remove from heat 
2.      Meanwhile, beat egg yolks on medium speed with a hand mixer in a large mixing bowl.  Gradually add remaining brown sugar, beating until sugar is dissolved and eggs are thick.
3.      Temper the eggs by adding about 1 cup of the hot cream mixture slowly to egg mixture, a 1/4 cup at a time, whisking egg mixture constantly. 
4.      Slowly add egg mixture back to cream mixture on stove, stirring constantly.  Turn heat back on medium.  Beat in sweet potatoes, cinnamon, nutmeg, and ginger on medium speed with a hand mixer until blended.  Heat mixture for about 10-12 minutes, stirring often, or until mixture thickens and leaves a path on the back of a wooden spoon when you run your finger across it. (There will be sweet potato lumps, but this is okay.)
5.      Remove from heat and stir in vanilla.  Strain mixture into large pitcher through a fine mesh strainer, mashing the pulp with the back of a spoon.  Discard pulp.  Refrigerate for at least 4 hours or better yet, overnight.  Pour mixture into the cylinder of an ice cream maker and freeze in ice cream freezer according to manufacturer’s instructions.  When done, transfer to a freezer safe container and freeze for 4 hours or overnight or until firm.  


Pin It!